Sod Installation Now’s The Time | The Rainy Season Has Hit Pinellas County
Sod Installation Now’s the Time | The Rainy Season Has Hit Pinellas County
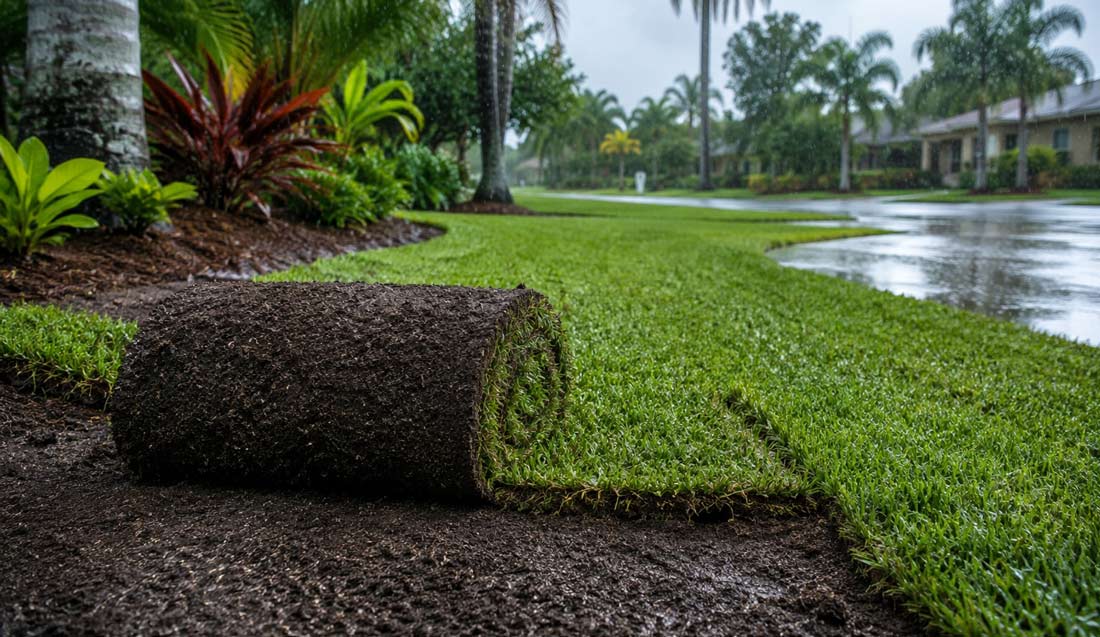
If you’ve been thinking about new sod, stop waiting. Florida’s rainy season — running from roughly June through September — is one of the best windows all year to put down fresh turf in Pinellas County. The daily afternoon rain does a lot of the establishment work for you, and soil temperatures are warm enough to push roots down fast.
New sod needs consistent moisture to take root. In Pinellas County, the dry season makes that a costly irrigation challenge. But once the rainy season kicks in, your lawn gets a natural head start — and a professional installation done right can mean lush, green turf that locks in well before summer is over.
That said, there’s more to it than dropping sod and letting the sky do the rest. Here’s a clear breakdown of what homeowners and property managers in Largo, Seminole, Clearwater, and across the county need to know before, during, and after sod installation.
Before Installation: Setting the Stage for Success
The work that happens before the first roll of sod is unloaded from the truck matters more than most homeowners realize. Skipping prep steps is the number one reason new sod fails — even when conditions are ideal.
Choose the Right Grass for Florida’s Climate
Not all sod performs equally in Pinellas County’s humid, subtropical environment. The two most popular and proven options locally are:
- St. Augustine (Palmetto or Floratam): The go-to for most Pinellas County yards. Tolerates heat, humidity, and partial shade. Establishes quickly and produces a dense, carpet-like appearance. Palmetto is especially resilient through weather extremes.
- Zoysia: A slower-growing but ultra-durable option. Handles moderate foot traffic well and has excellent drought recovery once established. Slightly higher upfront cost but lower long-term maintenance.
Bermuda is another option — particularly common in commercial settings — though its aggressive growth pattern can be a nuisance near garden beds and hardscaping.
Have your soil tested before installation. Pinellas County’s sandy soil drains quickly, which is great in the rainy season but means nutrient retention is limited. A soil assessment helps dial in the right amendment strategy before sod goes down.
Soil Prep and Grading
Proper soil preparation involves clearing the area of old grass, weeds, rocks, and debris. The soil should be tilled to at least 2–3 inches and graded to ensure proper drainage away from your home’s foundation.
Poor grading is particularly costly during rainy season. If water pools on or near new sod, it can suffocate roots and invite fungal issues. A professional landscape maintenance team will spot and correct drainage problems before installation — not after.
Timing Your Install
Aim to install sod at the start of a rainy pattern rather than in the middle of a dry spell. Early June through mid-July is ideal in most of Pinellas County. Avoid scheduling within days of a forecasted tropical system — heavy concentrated rainfall can displace freshly laid sod on graded soil.
During Installation: What a Professional Sod Job Looks Like
If you’re hiring a lawn care team (which, for anything larger than a small patch, is strongly recommended), here’s what a proper installation involves so you know what to look for on the day.
Step 1
Soil Prep
- Old grass removed
- Soil tilled & leveled
- Starter fertilizer applied
- Irrigation checked
Step 2
Sod Laying
- Staggered brick-pattern rows
- Tight seam fitting
- Cut edges at borders
- No gaps or overlapping
Step 3
Finishing
- Rolled to improve contact
- Immediate deep watering
- Edges secured
- Aftercare plan provided
Sod should be installed in staggered rows — like a brick pattern — to minimize visible seam lines and promote even coverage. Every piece should sit flush with the next, with no gaps that allow weed infiltration and no overlapping that creates raised ridges.
Watering Immediately After Installation
Even during rainy season, the first watering should happen within 30 minutes of the last piece being laid. This initial soaking is critical — it pushes out air pockets between sod and soil and begins the root-to-soil contact that determines whether turf establishes or fails.
Your irrigation system should be checked and adjusted before installation day to ensure every zone covers the new area evenly. Dry corners and edges are a common failure point.
After Installation: The First 30 Days Are Everything
Rainy season does a lot of heavy lifting in the establishment phase, but it doesn’t mean you can set and forget. The 30 days after installation are where most sod wins or loses.
Watering Schedule: Balance Is the Goal
During rainy season, your irrigation system should be working with the rain — not against it. A smart controller that automatically skips when sufficient rainfall has occurred is the best tool here. Manually supplement on days when there’s been no measurable rain, watering early morning for best absorption.
Overwatering is a real risk during this period. Soggy sod doesn’t root well, and Florida’s heat turns excess moisture into a breeding ground for fungal diseases like brown patch and gray leaf spot. If you see yellowing, mushroom growth, or a musty smell, reduce irrigation immediately.
Stay Off the New Sod
Foot traffic on new sod before roots establish (typically 2–3 weeks) compresses the turf and breaks fragile new root growth. Keep kids, pets, and lawn equipment off the area for at least two to three weeks. If you’re installing at a condo or multi-tenant property, temporary barriers or signage can help communicate the restriction to residents.
Mowing New Sod for the First Time
Wait until the sod has knitted into the soil before the first mow — you’ll know it’s ready when you can tug on a corner and it resists rather than lifts. For St. Augustine, that’s typically 14–21 days after installation under good rainy-season conditions.
Set your mower height higher than usual for the first cut. Removing more than one-third of the blade length stresses new turf. A higher first cut encourages lateral spreading and root depth over vertical growth.
Fertilizing After New Sod
Hold off on a full fertilization program until sod has been in the ground for 30–45 days. Starter fertilizer applied at installation is enough for the establishment phase. Pinellas County also restricts fertilizer applications during the rainy season — no nitrogen or phosphorus fertilizers between June 1 and September 30 under county ordinance. Work with your lawn care provider to time post-establishment feeding appropriately.
After the 30-day mark, schedule a professional walkthrough to assess establishment. A trained eye will spot thin patches, drainage issues, or early disease that homeowners often miss until it’s harder to correct.
Why Rainy Season Sod Installation Works So Well in Pinellas County
The logic is simple: new sod needs water constantly for the first few weeks, and Florida’s rainy season delivers that almost automatically. What would cost a significant amount in water bills during a dry winter install essentially happens for free when the afternoon storms roll in.
But there’s more to it than moisture. Soil temperatures in early summer are warm enough to encourage rapid root activity — roots push down quickly, which speeds up establishment timelines. Cooler winter temperatures slow this process considerably, even when irrigation is sufficient.
The combination of warmth, natural rainfall, and long daylight hours creates near-ideal conditions for the St. Augustine and Zoysia varieties that perform best in this region. Properties that install sod in June or July are often seeing full, healthy establishment by August — just as the rainy season is tapering off into the more temperate fall weather Pinellas County enjoys.
The Lawns & Palms team has handled sod installations across Pinellas County for years — from small residential yards in Seminole and Largo to large commercial properties and condo complexes in Clearwater and Pinellas Park. The team knows what local soil conditions require and how to time installations for maximum establishment success.
Frequently Asked Questions
How soon after rainy season starts should I install sod?
Once consistent afternoon rain patterns are established — usually by early to mid-June in Pinellas County — you’re in a good window. Avoid the first few weeks if the season starts with heavy storms; wait for a reliable but moderate pattern.
Can I install sod myself during rainy season?
Small DIY patches (under 200 sq ft) are manageable for handy homeowners. For full lawn installs or anything involving grade changes and irrigation coordination, professional installation is strongly recommended — mistakes in soil prep and seaming are costly to correct.
What if it rains heavily right after installation?
Light to moderate rain within 24 hours of installation is actually beneficial. Heavy, sustained rain on newly laid sod with improper grading can cause displacement or saturation issues. A professional installer will assess and correct grading before laying sod precisely to avoid this risk.
How long before new sod looks fully established?
In rainy season conditions, most St. Augustine sod looks fully established in 4–6 weeks. Zoysia takes slightly longer — 6–8 weeks — but produces a denser result. You’ll notice seams disappearing and consistent color as an indicator of good root activity.
Do Pinellas County water restrictions apply to new sod?
Yes, though there is typically a new-sod exemption during the establishment period. Check with your water utility (Pinellas County Utilities or your municipal provider) for the current waiver process. Your lawn care provider can assist with this documentation.
Ready to Put Down New Sod?
The rainy season window is open. Lawns & Palms installs premium sod across Pinellas County — from Largo and Seminole to Clearwater and Pinellas Park.